Unexpected gearbox failure stops production dead in its tracks, turning a profitable shift into a logistical nightmare. You rely on your heavy machinery to hit aggressive targets, but a single worn worm gear deteriorating silently inside a housing can sabotage your entire operation. The cost isn’t just the replacement part; it is the thousands of dollars in lost revenue, the expedited shipping fees, and the potential safety hazards posed to your maintenance team during an emergency repair.
Ignoring subtle signs of wear like micropitting or slight misalignment often forces you into a “fix-it-now” panic rather than a planned maintenance schedule. Can you truly afford to explain another significant delay to your key client because a critical component failed prematurely? A systematic inspection routine is your absolute best defense against these surprises. By mastering visual checks, dimensional verification, and wear pattern analysis, you can predict failures before they happen. This guide provides a professional framework for worm gear inspection, backed by the high-precision manufacturing standards of Yantong Tech, ensuring your equipment runs reliably for the long haul.
1. Essentials of Worm Gear Inspection
Why must you inspect the worm and wheel together?
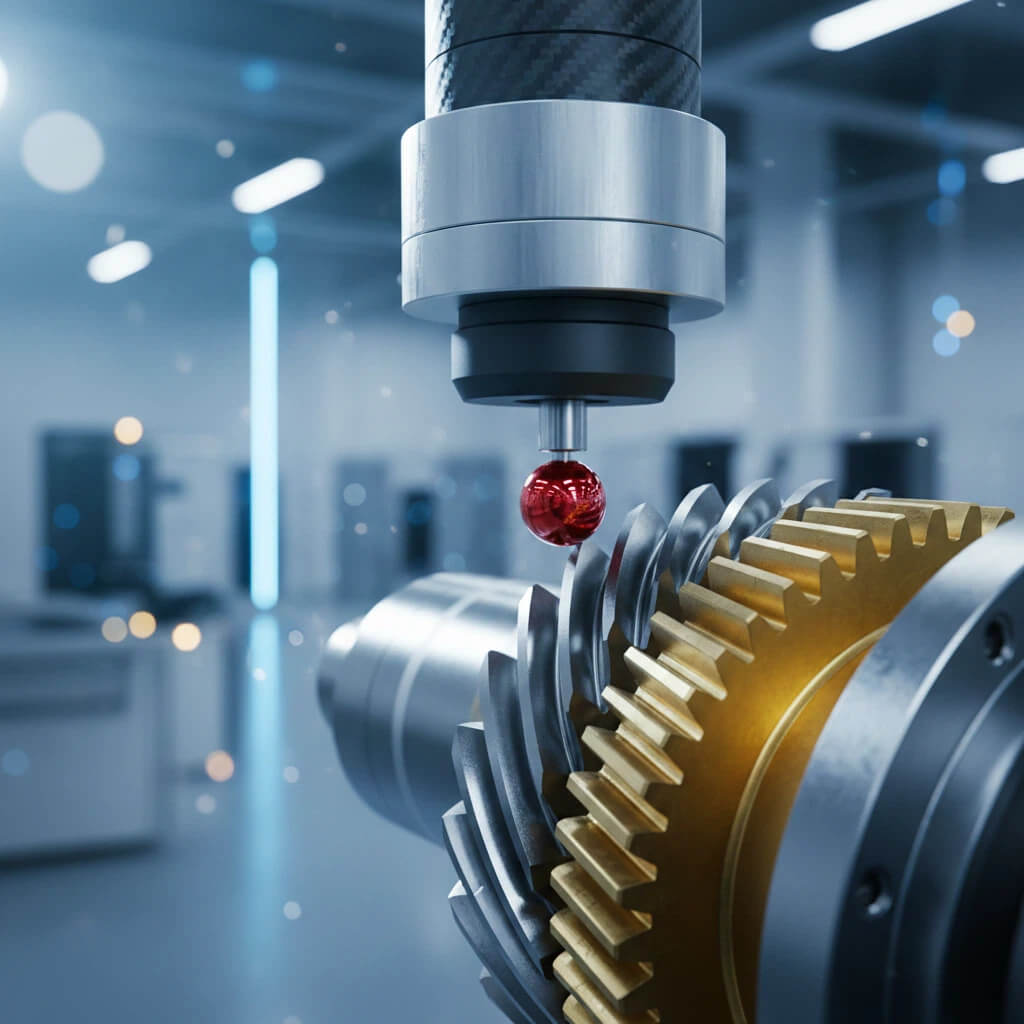
The worm acts as the driving screw while the wheel transmits the torque, and this friction-heavy relationship demands they be treated as a unified system. You cannot inspect one without considering the condition of the other, as their wear patterns are inextricably linked.
- The Worm: Usually made of hardened steel (e.g., 20CrMnTi) to withstand high sliding friction.
- The Wheel: Typically manufactured from softer bronze to act as a sacrificial element.
- The Interaction: The harder worm will aggressively chew through a damaged bronze wheel in hours if surface finish is compromised.
But here is the thing…
If you replace only the bronze wheel while leaving a rough or damaged steel worm in place, you are guaranteed to fail again rapidly. The microscopic roughness on the old worm acts like a file, destroying the new component’s bedding surface immediately.
Key Takeaway: Always inspect the steel worm for surface roughness first; if the hard component is compromised, the entire set must be replaced to ensure system longevity.
How does material compatibility affect inspection?
High-precision manufacturing relies on exact alloy standards to manage the heat generated by sliding contact. During inspection, verification of material transfer or heat discoloration gives you clues about the compatibility of the pairing.
- Steel vs. Bronze: The standard low-friction pairing designed for controlled wear.
- Surface Finish: Rough finishes on the worm increase abrasive wear on the wheel.
- Heat Treatment: Essential for the worm’s longevity and fatigue resistance.
Key Takeaway: Verify material certificates and look for signs of “adhesive wear” (metal transfer), which indicates that the material pairing has failed under load.
2. Proven Worm Gear Inspection Techniques
Is visual inspection sufficient for critical drives?
Visual checks are your first line of defense, but they often miss the subsurface fatigue that precedes catastrophic failure. You need to look for specific surface distress markers that tell the history of the gear’s operation.
- Surface Pitting: Small craters indicating fatigue from contact stress.
- Discoloration: Blue or straw colors signaling overheating and oil breakdown.
- Debris: Gold or bronze-colored metal flakes in the oil sump.
You might be wondering…
Can I stop at a visual check? For non-critical low-load applications, perhaps, but for heavy industrial machinery, visual inspection is only the starting point of a reliable maintenance plan.
Key Takeaway: Visual inspection identifies obvious failures, but cannot predict remaining fatigue life without further dimensional or NDT testing.
When should you use NDT methods?
Non-Destructive Testing (NDT) reveals what the naked eye cannot see and is crucial for high-load applications like cranes or mining conveyors. It allows you to assess the integrity of the steel worm without destroying it.
- Magnetic Particle (MPI): Finds surface cracks on steel worms invisible to the eye.
- Ultrasonic Testing (UT): Detects internal voids in castings or deep fatigue cracks.
- Dye Penetrant: Highlights surface fractures on non-ferrous bronze wheels.
Summary of Inspection Methodologies
| Inspection Method | Target Defect | Best For | Complexity |
|---|---|---|---|
| Visual (VT) | Surface wear, pitting, color changes | Routine daily/weekly checks | Low |
| Dimensional | Tooth thickness, runout, backlash | Planned maintenance intervals | Medium |
| Magnetic Particle | Surface cracks, fatigue lines | Steel worms during overhaul | High |
| Ultrasonic (UT) | Internal voids, subsurface flaws | Quality control of raw materials | High |
| Oil Analysis | Contamination, bronze particles | Predictive condition monitoring | Medium |
Expert Analysis: While visual inspection catches 70% of issues, integrating oil analysis provides the earliest warning of failure, aligning with Yantong Tech’s philosophy of preventative reliability.
Key Takeaway: Use NDT methods for critical assets where gear failure poses a safety risk or significant financial loss, ensuring you catch hidden defects early.
3. Tools Required for Worm Gear Inspection
What basic tools do you need for field checks?
You don’t always need a laboratory; effective field inspection starts with a robust toolkit that allows you to quantify wear right at the machine. These tools help you turn subjective observations into actionable data.
- Calipers/Micrometers: For checking tooth thickness and shaft diameters.
- Telescoping Gauges: For measuring internal bore wear and ovality.
- Inspection Mirror/Borescope: To view mesh points inside tight housings without full disassembly.
Here is the deal…
Measurement consistency is key; using the same tools and the same operator for periodic checks ensures that the wear trend you see is real, not just measurement error.
Key Takeaway: Specific hand tools allow for consistent field data, which is vital for tracking wear trends over time and planning replacements.
Do you need advanced CMM equipment?
For B2B sourcing and quality control of incoming parts, Coordinate Measuring Machines (CMM) are non-negotiable. They verify complex geometries that hand tools simply miss.
- Profile Error: Checks the exact involute curve against the ISO standard.
- Lead Deviation: Ensures smooth power transmission along the helix.
- Pitch Variance: Prevents vibration and noise by ensuring even spacing.
Comparison of Inspection Tools
| Tool Category | Specific Equipment | Application | Precision Level |
|---|---|---|---|
| Visual Aids | Borescope, Magnifying Glass | Surface finish, visual defects | N/A |
| Hand Tools | Micrometer, Vernier Caliper | Shaft diameter, tooth thickness | +/- 0.01mm |
| Advanced | CMM (Coordinate Measuring Machine) | Profile, lead, pitch, runout | +/- 0.001mm |
| Contact | Roll Tester | Composite error, flank contact | High |
| Thermal | Infrared Camera | Operating temperature peaks | Moderate |
Expert Analysis: Investing in CMM verification for incoming batches ensures you aren’t installing parts with inherent geometric errors, a standard practice at Yantong Tech to guarantee ISO Grade 6 precision.
Key Takeaway: Require CMM reports from your supplier to verify ISO grade accuracy before installation to avoid building faults into your machinery.
4. Diagnosing Defects During Worm Gear Inspection
What does pitting indicate about load?
Pitting is a distinct sign of surface fatigue caused by excessive contact stress that exceeds the material’s endurance limit. It usually appears near the pitch line where the friction and pressure are highest.
- Initial Pitting: Minor spots during break-in that may stabilize.
- Progressive Pitting: Large craters that spread rapidly and destroy the profile.
- Spalling: Large chunks of metal flaking off, indicating imminent failure.
It gets worse…
If you ignore progressive pitting, the debris generated will contaminate the oil, turning the lubricant into an abrasive compound that destroys the bearings and seals as well.
Key Takeaway: Progressive pitting is a “replace immediately” signal, as it leads to rapid vibration and inevitable tooth breakage.
Why is scoring so dangerous?
Scoring occurs when the lubricant film breaks down completely, allowing metal-to-metal contact. It results in vertical scratches that weld and tear the surface, destroying the gear geometry.
- Lubrication Failure: Wrong viscosity or low levels lead to film rupture.
- Overheating: Breakdown of oil properties due to thermal stress.
- Roughness: Vertical scratches on tooth flanks that increase friction.
Common Defects Analysis Table
| Defect Type | Visual Appearance | Root Cause | Recommended Action |
|---|---|---|---|
| Pitting | Small craters/holes on flank | Surface fatigue, overloading | Reduce load, check service factor |
| Scoring | Vertical scratches, rough patches | Lube breakdown, overheating | Upgrade oil viscosity, check cooling |
| Abrasive Wear | Dull, gray lapped surface | Contaminated lubricant | Flush system, install better filters |
| Tooth Fracture | Broken or cracked teeth | Shock load, extreme overload | Replace gear, install torque limiter |
| Corrosion | Rust or chemical etching | Water/acid in lubricant | Check seals, analyze oil acidity |
Expert Analysis: Most “gear failures” are actually lubrication failures in disguise; Yantong Tech engineers recommend regular oil analysis to prevent these defects before they damage the hard steel surfaces.
Key Takeaway: Scoring confirms lubrication failure; changing the gear without fixing the lube system will simply result in a repeat failure within days.
5. Executing Your Worm Gear Inspection Routine
How do you prepare for a safe inspection?
Safety and cleanliness are the absolute prerequisites for a successful inspection. You cannot measure a dirty gear accurately, and you cannot inspect safely without locking out energy sources.
- Lockout/Tagout: Ensure zero energy state to prevent accidental rotation.
- Cleanliness: Remove sludge and oil residues to reveal surface details.
- Documentation: Have original drawings ready to compare against findings.
Now listen closely…
A clean gear reveals hairline cracks that a dirty gear hides; never skip the cleaning step, or you might miss the most critical warning sign.
Key Takeaway: Prioritize cleaning and safety preparation to ensure your inspection data is accurate and you remain safe during the process.
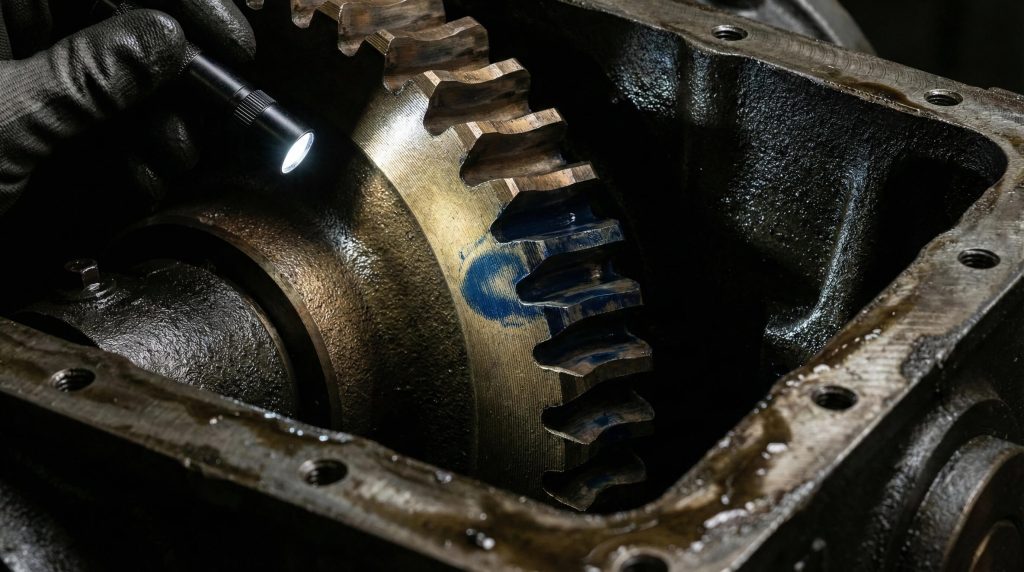
How to check contact patterns correctly?
The contact pattern tells you exactly how well the gears are meshing under load. It is the definitive test for alignment accuracy and manufacturing quality.
- Apply Blueing: Coat the worm wheel teeth with marking compound.
- Rotate Assembly: Run under light load to simulate operation.
- Analyze Mark: Look for a centralized oval shape on the tooth flank.
How is backlash measured accurately?
Backlash is the play between mating teeth, and tracking it is vital for determining wear rates. Too little causes binding; too much causes vibration and shock loading.
- Dial Indicator: Mount securely on the housing referencing the tooth.
- Block Output: Hold the worm shaft stationary.
- Rock Input: Move the wheel and read the total play on the indicator.
Key Takeaway: Compare measured backlash against the AGMA/ISO standard for your specific center distance to determine the actual wear level of the set.
6. Standards Guiding Worm Gear Inspection
How do AGMA and ISO differ?
Global supply chains require you to understand both standards to avoid costly purchasing errors. European and American prints often use different grading systems that can confuse even experienced engineers.
- AGMA 2011: The dominant US standard for worm gear inspection.
- ISO 1328: The international metric standard used globally.
- Grading Reversal: Old AGMA (Higher is better) vs. ISO (Lower is better).
Think about this…
If you confuse these grades, you might order a rough agricultural gear (ISO Grade 10) for a precision automation application (ISO Grade 6), leading to immediate noise and failure.
Key Takeaway: Specify the exact ISO quality grade in your RFQ to ensure you receive components that match your reliability requirements.
Why does quality grading matter for ROI?
The “Quality Number” dictates the allowable error in the gear’s geometry. It directly impacts noise, vibration, and the Total Cost of Ownership (TCO).
- Grade 6-7 (ISO): Precision, ground teeth (Yantong Standard).
- Grade 10-12 (ISO): Cut teeth, general purpose use.
- Traceability: Documentation proving the grade is essential for QA.
Quality Grade Comparison Table
| Standard | Precision Ground (High Accuracy) | Commercial Cut (Medium Accuracy) | Rough Cut (Low Accuracy) |
|---|---|---|---|
| ISO 1328 | Grade 4 – 6 | Grade 7 – 9 | Grade 10 – 12 |
| DIN 3962 | Grade 4 – 6 | Grade 7 – 9 | Grade 10 – 12 |
| AGMA 2000 | Q12 – Q14 | Q8 – Q10 | Q5 – Q7 |
| Application | Robotics, Aerospace | General Industrial, Conveyors | Construction, Agriculture |
Expert Analysis: Yantong Tech typically manufactures to ISO Grade 6 or 7 for ground worm gears, ensuring that our parts run quieter and last longer than commercial-grade alternatives.
Key Takeaway: Investing in a higher quality grade upfront reduces downtime and maintenance costs significantly over the life of the machine.
7. Safety Protocols for Worm Gear Inspection
What are the major stored energy hazards?
Worm gears often drive heavy vertical loads due to their self-locking nature. Releasing the brake or disassembling the drive without securing the load can cause catastrophic drops.
- Stored Energy: Suspended loads must be mechanically blocked.
- Pinch Points: Mesh points can cause amputation instantly.
- Hot Oil: Burn hazards exist if inspected immediately after shutdown.
Don’t overlook this…
Never inspect a hoist or lift drive without physically blocking the load independent of the gear brake; reliance on the gear’s self-locking feature during maintenance is a fatal mistake.
Key Takeaway: Always mechanically block vertical loads before beginning any inspection to prevent gravity-induced accidents.
How to inspect chemically safely?
Industrial lubricants and cleaning solvents pose health risks. Proper protocol ensures you don’t suffer from dermatitis or respiratory issues.
- PPE: Nitrile gloves, safety glasses, and barrier creams.
- Ventilation: Ensure airflow when opening hot gearboxes.
- Disposal: Follow environmental protocols for waste oil and rags.
Key Takeaway: Prioritize personal safety equipment and environmental controls to protect yourself and your facility during the inspection process.
Conclusion
Worm gear failure is rarely a sudden, unpredictable event; it is almost always a progressive process that announces itself through wear patterns, particles in the oil, and dimensional shifts. By ignoring these signs, you risk costly downtime, expensive emergency repairs, and potential safety incidents. However, by implementing the visual, dimensional, and NDT methods outlined in this guide, you transform inspection from a tedious chore into a strategic advantage that protects your bottom line.
At Yantong Tech, we believe that true reliability starts at the manufacturing stage. We provide high-precision worm gears with full material traceability and ISO-grade accuracy, ensuring that when you inspect our parts years down the line, they are still performing within spec. We don’t just sell gears; we provide the engineering confidence you need to keep your operations running smoothly.
Ready to upgrade your supply chain reliability? Contact Yantong Tech today for a consultation on high-precision worm gears tailored to your specific industrial needs.
Frequently Asked Questions (FAQ)
Q1: How often should I inspect my worm gears?
Judgment: It depends entirely on the duty cycle and load factor.
Reason: For continuous 24/7 operation or heavy lifting, quarterly inspections are mandatory to ensure safety. For intermittent use, annual inspections combined with regular oil analysis are typically sufficient to catch early wear before it becomes critical.
Q2: Can I replace just the bronze worm wheel and keep the old steel worm?
Judgment: Generally, no—it is a risky practice that leads to rapid failure.
Reason: The steel worm develops a specific wear pattern matching the old wheel. Installing a new wheel against a worn worm leads to rapid “point-contact” wear, significantly shortening the life of the new component.
Q3: Is pitting always a reason to replace the gear immediately?
Judgment: No, not always, but it requires close monitoring.
Reason: “Initial pitting” can occur during break-in and then stop once the load is distributed. However, “destructive pitting” that covers a significant percentage of the tooth flank or shows signs of spalling requires immediate replacement planning.
Q4: Can I use standard grease instead of specialized worm gear oil?
Judgment: Absolutely not; this is a primary cause of failure.
Reason: Worm gears operate in a “boundary lubrication” regime with high sliding friction. They require specialized oils (often PAG-based) with Extreme Pressure (EP) additives designed to withstand the wiping action that would strip away standard grease.
Q5: Why is my new worm gear set overheating?
Judgment: It is likely due to misalignment, too much oil, or the wrong viscosity.
Reason: While lack of oil is bad, “churning” caused by overfilling generates excessive heat. Additionally, tight backlash or misalignment creates friction. Verify the oil level and contact pattern first before assuming component failure.